Friday, 29 July 2011

Altered bottle top

I set a challenge on my facebok page to alter a bottle top and here is my effort

I choose a fabric softener bottle and made a table decoration. I used a cola can for the metal petals, which were cut in my bigshot, burnished in a open flame....if you decide to do this a} have plenty of ventalation the fumes pong and 2] be warned the plastic cola coating does catch fire.
I free hand embossed and coloured with alcohol inks. The inner was filled with a mix of heavey beads, paper and PVA. Small beads were threaded onto wires and wound around a thin knitting needle

Tuesday, 5 July 2011

Bragg Book in a Box

Here is my challenge for July.

A BRAG BOOK IN A BOX

This is a perfect christmas gift for granny's aunts and uncles or just fond memories


MATERIALS

BOX

1 10in x 10in heavy or light card

1 10 1/4in x 10 1/4in as above

BOOK

2 3 1/2in x 3 1/2in thick card album covers

5 6in x 6in paper for pages

5 2 3/4in x 2 3/4in card for photo mounting

5 2 inx 2in card for hinges

1 3 1/4 x 3 1/4 backing paper

4in of ribbon 1/8 in or cord

1 button

TO MAKE THE BOOK

Take the 6x6 papers and place face down fold the sides to the middle [ like a gatefold]

accurately fold the corners into meet the fold line making 4 triangles,

Take care not to fold past the 1st fold.

Turn over and and fold the backs towards the front as far as the triangles


the sides shud just over lap. Do this to all 5 pages and insert the 2 3/4 x 2 3/4 crds tucking into the corners.

Take the 2x2 in pieces and make a fold diagonally.

Squeeze the pages and you will see a pocket glue the hinge front and back to the inside of the pocket


Take the next page and join simarilary take care NOT to glue the hinge too far in or the hinge doesn't work.

Do this with all pages making sure that some hinges fold frontways and the next backways, so you end up with a concertina of pages.

stick the last back page to one of the covers

centrally.


The album cover has the hinge stuck to the cover and inserted into the book [12], the book side of the hinge requires adjustment so that the covers match.

Thread the ribbon through the button and glue to the back of the front page

Stick the backing cover to hide and secure the hinge and the ribbon. decorate as you

wish.

THE BOX

Take the 10x 10 in paper and fold

1] corner to middle all 4 corners

2]side to middle all 4 sides

3]undo and have a point facing you

4]cut on the folds made to the square 4 times as shown


5] fold points back in


6] lift the fold and tuck under side 4 times

as shown


Repeat with the 10 1/4 x 10 1/4 paper this is the lid


Stick the book back to the inside of the box and put top on. decorate box


Fill with photos of your choice and add embellishments

Saturday, 2 July 2011

Make a Birdy house

Materials

1 A4 sheet of paper

1 contrast piece of paper 41/2 x 6 ins

Die cut shapes

Stamps

Inks

Glue

decorations

Down load the following templateMake the print out fill the whole of the A4, before you cut out, paint and stamp on the reverse side. I used spray paints for a mottled effect

then cut out and score the dotted lines.

Bend in all the little tabs and bend all folds, using your bone folder from the 2 central lines curl/condition the sides by stroking with the flat of the bone folder, only as far as the tab

dab little bits of glue on tabs and stick sides, each end at a time, allow to dry overnight.

Take the contrast piece and score 1/4 on each of the 2 long sides and then in half at 3insfold in half and snip a 45 degree angle through the 1/4 in fold, to form the gables

Cover the roof piece with die cut strips and distress with inks.

A small h*** can be made in top to hang, before glueing down.

Fill, stuff etc the insides NOW.

Glue roof on and leave overnight Finally add diecuts and decorations etc

Wednesday, 4 May 2011

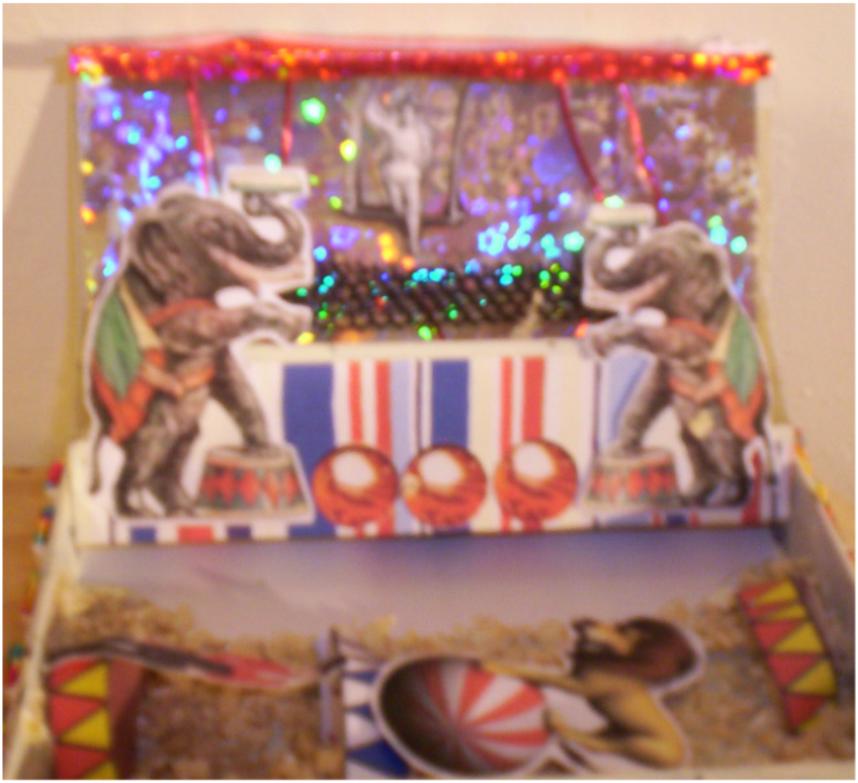
Altered Tape Cassette Case

This was something of a challenge!! I had so many ideas rolling around and couldn't make up my mind what to do, so I ended up contacting the swap partner for a theme. She chose the Circus. And well here's the result. In all fairness it was just sooooooo difficult.


I chose some bright stripy paper and covered the front and put an retro circus pic on front


Next ito the lid i use holographic paper on the back, a retro image of a trapeeze artist complete with mesh safety net added the elephant images and some dots to look like lights. When closed the bottom of the elephants could be seen so it was necessary to stick the back stripy picece of paper across to meet the hinge


Into the bottom of the cassette after removing the little pegs with pliers, i put a generous coating of pva glue and covered with wood shavings. Mad a couple of circus podiums and stuck images of a lion and ring master.


Some bright tape/ ribon around the edge completed the look

Tuesday, 3 May 2011

MAKE A BOOK

You are aiming for something like this

MATERIALS


2 4x6 grey board [heavey weight card]

6 4x6ins paper

inside pages 3 ¾ x 6 ins plain coordinating paper

Rubber stamp of choice

Co ordinating ink pad

2 long pronged brads

Pritt stick

bone folder

embellishment

Take the grey board and cut a strip 3/4 off then a following 1/4 ins.

Using one of of the 6x4 pieces, cover the 3x6 board

I used this maroon board instead of grey, but it is the same thickness

Now take a piece of the 4x6 ins and stamp an image, then tear this piece and stick to another 4x6 ins piece


Now stick the 3x6 grey board down and wrap the sides and stick


Now add any embellishments or decorations !!

next lay face up another 4x6 piece, and stick down the 3x6 and the 3/4 in strip. Make sure to leave the gap!!

now use the bone folder to make a firm crease

Turn over and back the page with another of the 4x6 pages.

Now cover the back board and now for the inner pages, these are all 3 3/4 ins by 6ins, put in as many as you wish.

Put a mask over the pages leaving just a 1/4 ins strip and stamp the image on this strip on every page

Now assemble the book, hold all together [a peg can be used to hold] and punch a h*** top and bottom and insert the brads, this means more pages can be added at a later date

Here is the finished book

Paper basket


Make a paper Basket

Materials

1 double sided scrapbook paper 12x12

4 squares of 1st colour 3 3/4 x 3 3/4

4 squares of 2nd colour 3 3/4 x 3 3/4, cut into diagonals

PVA glue

Ribbon

8 eyelets

Tools

Paper trimmer

Ruler

Scoring tool

Cropodidle/ h*** punch

Decide on the inside colour/pattern and place face down

Next take a ruler and embossing tool score 4 lines 4ins for the edges

Then score the 4 corners from edge to the cross section of embossed lines

Now fold in all the straight lines and sharpen with a bone folder

Next squash the corners

Again use the bone folder to make sharp creases.

The paper should now look like this

Again lay the paper flat inside face down, take the squares and triangles and glue down with PVA.

If you wish to stamp on the paper or add embelishments now is the time to do it!

The squares and triangles are slightly smaller than the square folds, so make sure you centre the papers.

the next job is to punch holes on the corners on ech triangle tip, its important to position the h*** inside the triangle


continue for all 4 corners, 8 holes in all, then add eyelets

and thread ribbon through the eyelets, its best to use the ribbon direct from the roll

tie the ribbon off and fill

Some ideas include a table centre bread basket

gift basket for new mum filled with cotton buds, wool balls, nappies and soother

If you want to make a smaller basket dimensions are 9x9 paper and 2 3/4 x 2 3/4 and score at 3ins in

Smaller again 6x6 paper and 1 3/4 x 1 3/4 and score 2ins

tinyest 3x3 paper and 3/4 x 3/4 and score at 1in

Monday, 11 April 2011

Altered Box

Altered Art Box


This was a box that held a china cup, my daughter wanted a small sewing box
So i designed several coloured papaers of the same pattern [ examples of pattern cutting]
Then decopatched them onto the box, I tore up some tissue patterns and decopatched on top.
I used a sponge to add distressed tea dye to the edges.
Glitter pens added fake stitching to the joins.
Then on the top I punched holes and used wired to add a sewing bobbin, small cotton real, elastic, buttons, lace trim, lace , curtain tape and a ribbon rose